
I have had this website / blog (going forward it shall be, the blog) on this current setup since about 2016, it has not always been a smooth ride. Always tinkering, always messing around with it when I do feel like it. However, I have enjoyed writing them.
The oldest post1 was first written back in 2011 on blogspot.com (called: FLOSS Bytes) , right around the time I got into Linux2 and open source communities. However, I wanted to move away from the clunky user interface of blogspot, which also included, as far as I remember, very difficult in theming. I was also very sold on the idea of a static site generator and hosting my own website, back then.
Finally, the popularity of Jeklly based Github pages and other static site generator tools like Hugo pushed me to pursue that route. The only requirement back then was for the setup to use a static site generator and not a content management system (CMS)3.
Overview of setup
I write my blog posts in Markdown using a text editor. This allows me to just concentrate on my writing and not get distracted by the view of the contents being rendered.

The Computer & File System on the far left represents the computer where I write my posts on, be that my laptop or desktop, or even on Github itself. I write the content and make sure any other contents like pictures are then stored in the right folders.
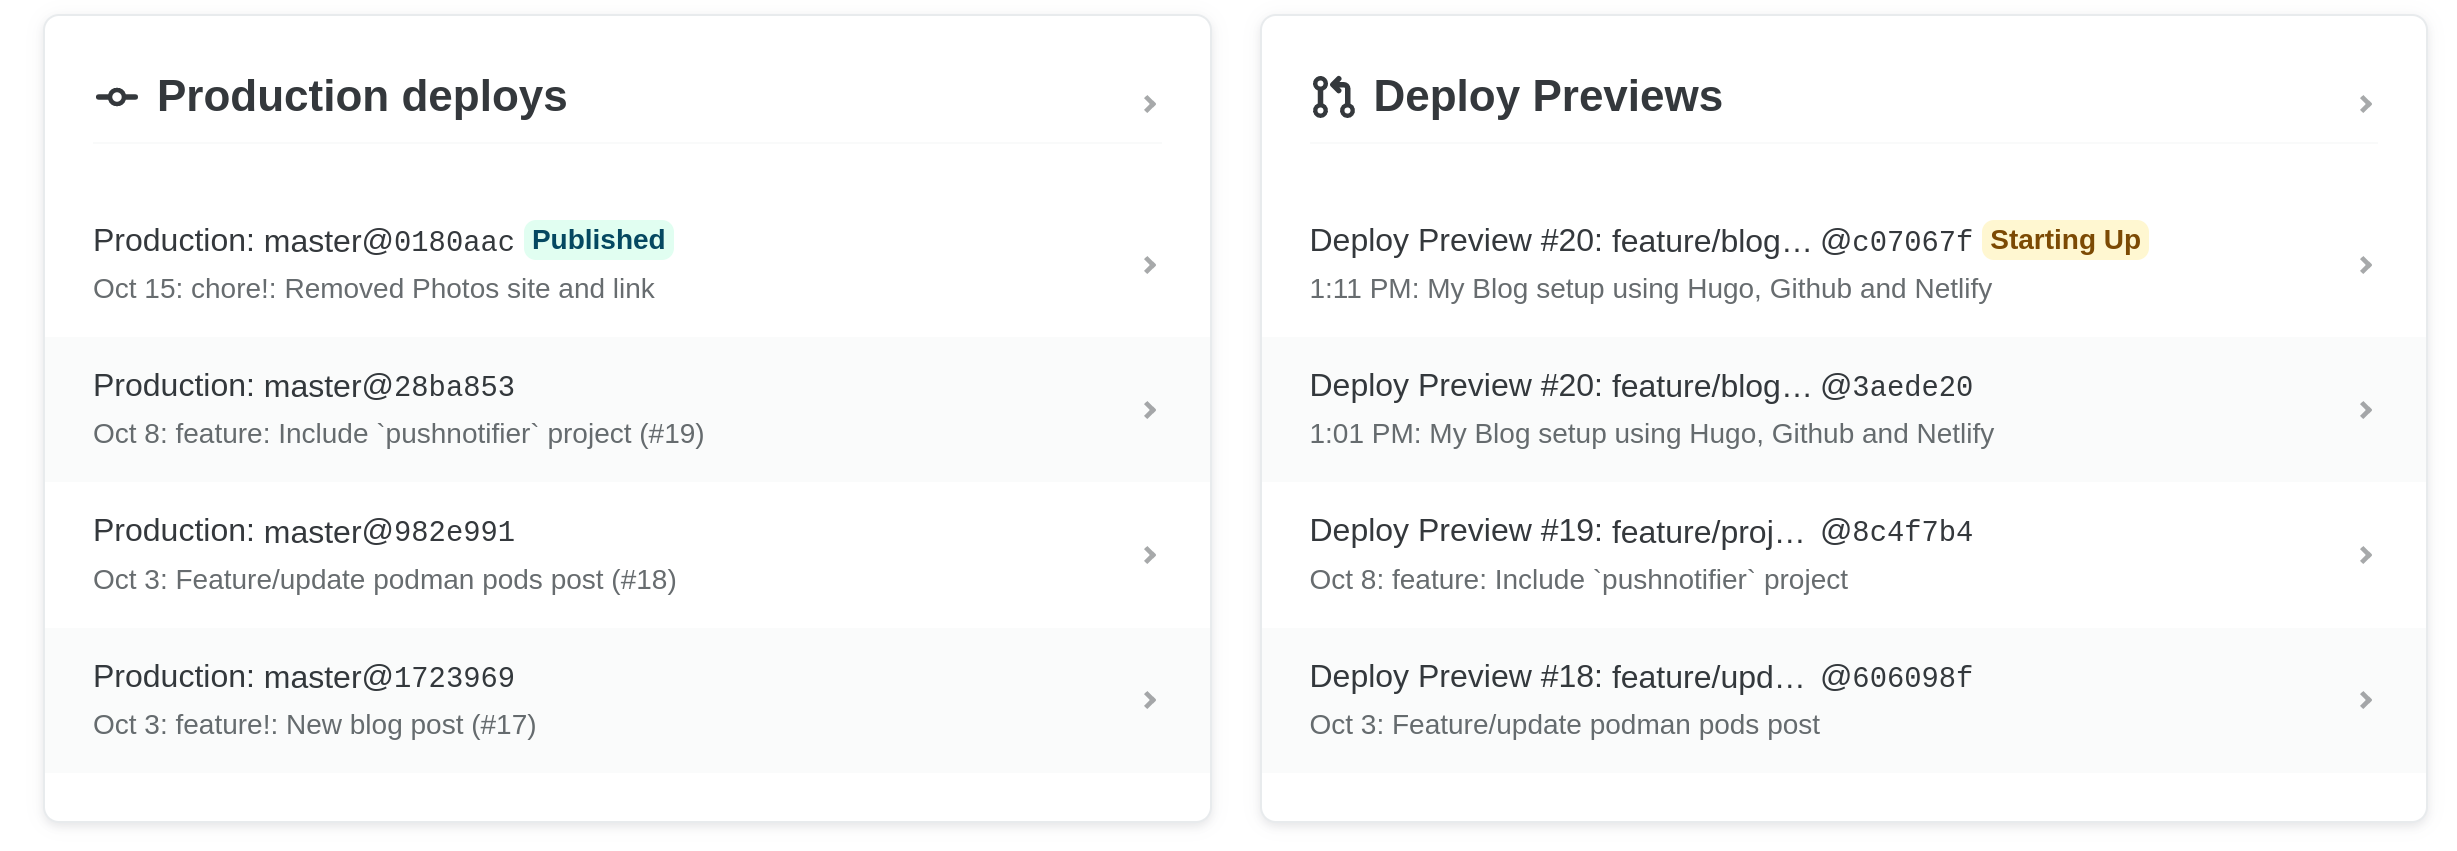
Once I am somewhat satisfied with my work, I push out the contents to my Git repository which is hosted on [Github][https://github.com/]. This allows me to revert/rollback my changes if I ever need to, create different branches for the contents or theme changes in its own branches in order for the main blog on mavjs.org to not be effected. You could call this modern day DevOps style blogging. 😄
When the contents get into git, pretty much instantly, Netlify app gets notified to build the site, and then makes the resulting built contents available on mavjs.org using its content delivery network. Netlify internally uses a Ubuntu Linux container with hugo in the background to create the build.
One of the advantages of using Git and its branching model, coupled with a platform like Netlify is that, because this blog was written in a different working branch once the work in progress contents are pushed to it, Netlify will create a preview of the content in its own URL. This way, you can use multi-branch model of Git to create multiple parallel experiments or writing content, while checking how the visuals would look in its final form.
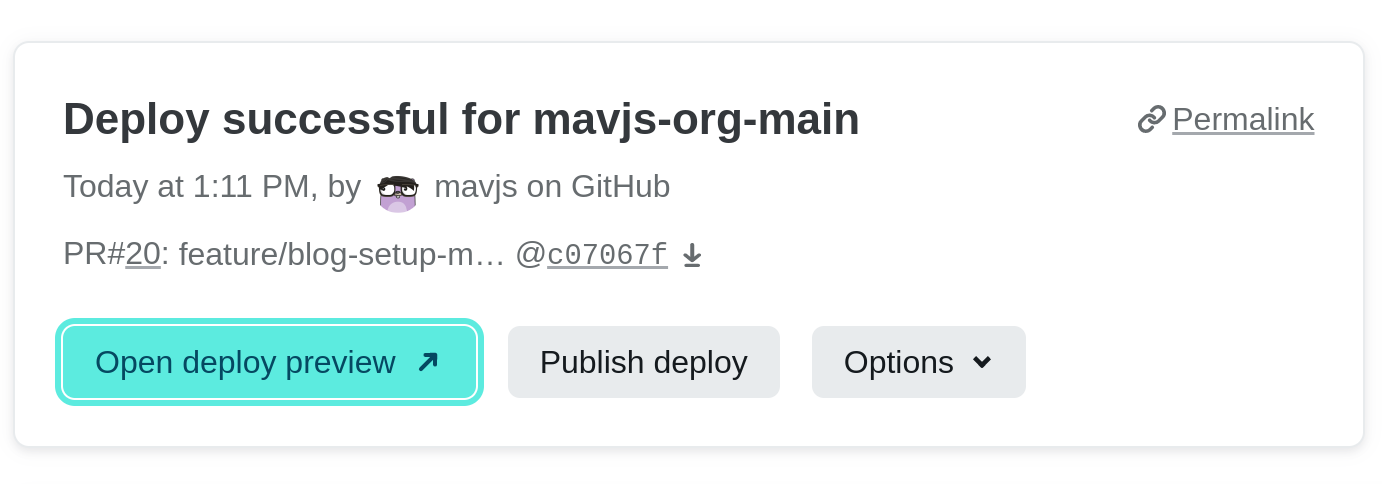
Once you click on the Open deploy preview button, it takes you to a URL in a following format: https://deploy-preview-<pull request number>--<project-name>.netlify.app/ and you can browse the contents as you would on the main live website. 😊

What is even better about this setup? It costs nothing, literally 0 EUR were spent on this setup, other than making accounts and using the free tier of each service. 😆 👍 👌
-
Of course, that also invovled lots of Linux distribution (or as the cool kids say: distro) hopping from Ubuntu to Arch Linux, back to Ubuntu and then finally landing on Fedora since then. 😆 ↩︎
-
https://www.cloudflare.com/en-gb/learning/performance/static-site-generator/ ↩︎